Festival Photography Bags: Tested for Speed
By Ravi Menon • 23rd Feb
Festival photography bags and concert photography gear differ from studio or travel setups in one critical way: reaction time determines whether you catch the peak moment or miss it entirely. The difference between a usable shot and a missed story often comes down to seconds, and those seconds live in your access window. Start with the kit and route; the logo comes last. If you're still choosing between a sling or a backpack, our street photography speed test shows how each style affects access windows in crowds.
Why Festival Bags Demand a Different Test
Festival environments impose constraints most daypack reviews ignore. You're moving through crowds, changing positions mid-set, shooting through multiple lighting phases, and your hands need to stay on gear between captures. Unlike a static studio or a day hike, concert photography gear placement isn't optional (it directly affects whether you stay inside the moment or drop out to reconfigure).
A few years back, on a humid downtown doc shoot, I missed a reaction because my top zipper snagged and the lens swap took eight seconds. That single friction point cost the shot. That night I built a timed access drill and reran the route with three bags. The winner cut swaps to four seconds and kept me inside the moment. The lesson stuck: bags aren't neutral carriers. They're performance tools that either accelerate or interrupt your workflow.
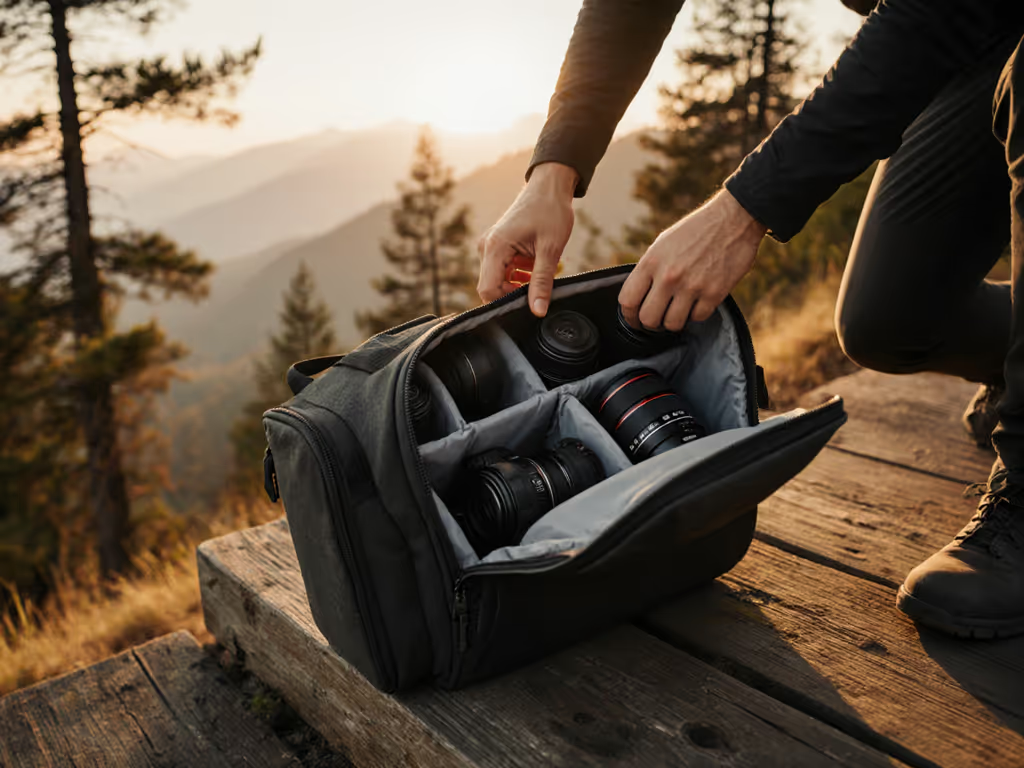
Step 1: Define Your Kit and Route
Before evaluating any bag, lock down two variables: your actual loadout and your movement pattern.
Map Your Typical Kit Weight
For most festival shooters, the standard music event camera bags configuration looks like:
- One mirrorless body: 1.3-1.5 lbs
- One backup body: 1.3-1.5 lbs
- 24-70mm lens: 1.2-1.8 lbs
- 70-200mm lens: 1.8-2.4 lbs
- Spare batteries and memory cards: 0.5 lbs
- Lens cloth, blower, UV filter: 0.3 lbs
Total: 6.4-9.0 lbs loaded. This matters. Many reviewers test empty bags or cite capacity in liters, a metric disconnected from how weight distributes on your shoulders over eight hours of standing, moving, and pivoting.
Document Your Physical Route
Note the typical movement sequence at your venue:
- Side-stage access (lateral movement, tight crowds)
- Pit position (forward/backward scramble, crouching)
- Lighting booth or elevated angle (stairs, possible climbing)
- Merch tent or green room (stationary, seated)
This determines where you need quick access and where full-open design is a bonus. Crowd photography organization requires you to know whether your fastest access point is facing the stage, facing the crowd behind you, or somewhere neutral. For step-by-step packing that prioritizes speed, use our camera bag organization guide.
Step 2: Establish Baseline Access Times
Repeatable measurement is the only way to cut through marketing claims. Use a phone timer or stopwatch.
The "Cold Start" Drill
With the bag fully loaded and zipped:
- Start timer.
- Locate and unzip your primary camera compartment.
- Extract your main body.
- Close the compartment.
- Stop timer.
Record this three times and average. Anything over 6 seconds means missed moments in fast sequences. Top performers in festival-grade bags hit 3-5 seconds. This is measurable and non-negotiable.
The "Lens Swap" Sequence
- Start timer with camera in hand, ready to shoot.
- Return camera to bag via quickest method (often a side pocket or top access).
- Extract your second lens.
- Install lens on camera body.
- Resume shooting position.
- Stop timer.
Festival sets move fast. A 12-second swap works; 20 seconds leaves you out of frame for the chorus. Record and average across five reps. Fatigue matters. Your tenth swap of the set will feel slower than your first, so validate under realistic endurance.
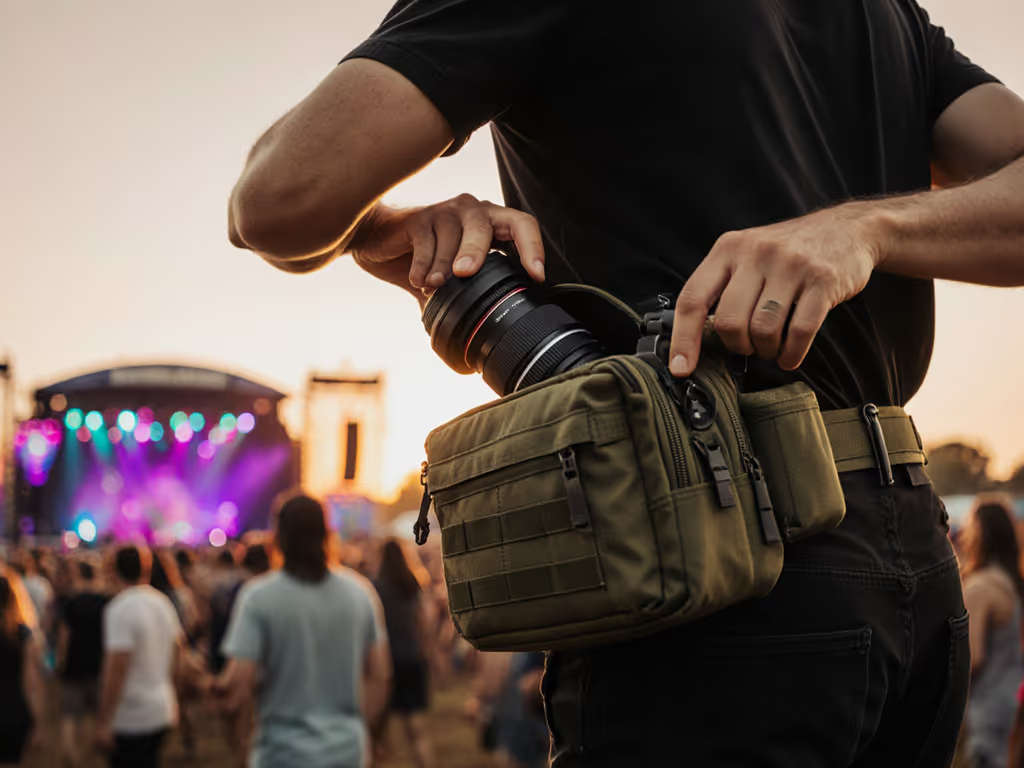
Step 3: Test in Actual Venue Conditions
Lab drills on a quiet bench don't predict festival performance. You need crowd photography realism: heat, humidity, movement, and pressure from bodies around you.
Run a Pre-Show Dress Rehearsal
Arrive 30-45 minutes before doors open. Load your bag as you would for the full shoot. Run your access drills in the actual venue, not in your car:
- Perform swaps while standing.
- Attempt access while wearing the layers you'll have on (jacket, harness, cycling gear if applicable).
- Test one-handed access (your other hand often holds a gimbal, monopod, or audio recorder).
- Move through the pit and side-stage positions and verify strap or compartment placement doesn't tangle with bodies.
If a feature feels awkward in rehearsal, it will feel worse in the adrenaline and fatigue of a live set. In packed pits, it's also worth reviewing anti-theft camera bag features to protect gear while you focus on the stage. This is where discreet event photography bags shine (a neutral side-entry bag feels less intrusive when you're packed tight with fans).
Monitor Weight Perception Over Time
Load the bag, set a timer, and carry it for 30 minutes of active movement. Stop and note your shoulder, neck, and lower-back fatigue on a scale of 1-10. A well-designed harness distributes load so that after 30 minutes you feel no worse than 3/10. Poor harness geometry or missing hip-belt load transfer will spike that number to 7/10 by minute 45. At that point, your movements slow and your access times creep up.
Step 4: Compare Comfort Metrics Under Full Load
Access speed means nothing if pain forces you to stop working halfway through.
Pressure Point Mapping
Put on the loaded bag and stand still for two minutes. Without moving, mentally scan:
- Shoulder tops: Should feel distributed, not pinched.
- Neck: Should be clear, no strap pushing into your trapezius.
- Hip bones: If there's a hip belt, it should sit snugly without digging.
- Mid-back: Should feel supported, not hollow.
Now move, walk, pivot, reach overhead, crouch. Pressure point "hot spots" often emerge only under dynamic load. A bag that feels fine standing still might shift uncomfortably when you're reaching for a lens or moving through a crowd.
Harness Adjustability for Your Torso
Most festival bags assume a "standard" 6-foot male torso. If you're outside that range (petite, tall, or have broad shoulders), test whether the shoulder harness can dial down far enough (or up) without leaving excess strap length flapping.
A properly fitted harness adjusts torso length so the sternum strap sits at the midpoint of your chest. If it rides too high or too low, weight transfer to the hips fails and all load lands on your shoulders.
Step 5: Validate Weather and Impact Performance
Liquid-resistant camera cases aren't just marketing. Festival outdoor venues bring genuine weather variability.
Rapid Water Exposure Test
Load the bag with a lens or dummy weight. Take it outside during rain or use a hose. Spray the entire exterior, including seams and zipper runs, for 30 seconds. Open the bag immediately. If water is pooling inside or has penetrated the main compartment, the bag's weather rating is overstated. See our real rain test results to compare which bags actually keep gear dry during sustained downpours. Real festival gigs sometimes mean rain during outdoor stages, you need to trust your gear stays dry.
Corner and Base Drop Test
With a spare, disposable lens or a weighted dummy, perform a controlled drop from waist height onto concrete or hard ground, hitting each corner and the bottom edge once. Open the bag and check for interior damage or loose padding. A truly protective bag absorbs that impact; a flimsy one will have separated layers or cracked corner reinforcements.
Step 6: Finalize Your Kit-First Fit Assessment
Once you've data-logged access times, comfort metrics, and durability, compare across your shortlist. Create a simple table:
| Metric | Bag A | Bag B | Bag C |
|---|---|---|---|
| Cold Start (avg sec) | 4.2 | 5.8 | 3.9 |
| Lens Swap (avg sec) | 11.5 | 14.2 | 10.1 |
| 30-min Shoulder Fatigue (1-10) | 3 | 6 | 2 |
| Pressure Hot Spots | None | Lower back | Neck |
| Water Penetration | None | Light seepage | None |
| Empty Weight (lbs) | 2.1 | 1.8 | 2.4 |
The fastest bag isn't always the best. Bag B might have a 30-minute fatigue score that disqualifies it for an 8-hour festival, even if its cold-start time is slower. The right choice maps directly to measurable performance under your specific route and kit.
Summary and Final Verdict
Festival photography bags live or die by repeatability and comfort under load. A bag with a 4-second access time and a 2/10 fatigue rating will keep you fast and inside the moment (where the best shots live). Conversely, a bag that feels good in a store but causes pressure hot spots or missed lens swaps becomes expensive dead weight on set.
Test under real conditions: your actual kit weight, your venue route, live crowds if possible. Time every access sequence. Map pressure points across 30 minutes of active work. This isn't obsessive. It's the standard every professional tool deserves. Your camera and lenses cost thousands. Your music event camera bags determine whether those tools stay fast and functional for the full session.
Once you've run these drills with your shortlist, the verdict will be unmistakable. The bag that combines measurable access speed, even load distribution, and proven weather protection isn't just the "best" bag on paper, it's the one that pays for itself in moments you don't miss. That's the threshold where kit-first fit becomes invisible, and your workflow finally comes first.
Related Articles